Why hunch over a laptop when you can use Raspberry Pi 4 to build a portable computer just for you? Here’s how HackSpace magazine editor Ben Everard did just that…
Yes, I have mislaid the CAPS LOCK and function keys from the keyboard. If you come across them in the Bristol area, please let me know.
Raspberry Pi 4
When Raspberry Pi 4 came out, I was pleasantly surprised by how the more powerful processor and enhanced memory allowed it to be a serious contender for a desktop computer. However, what if you don’t have a permanent desk? What if you want a more portable option? There are plenty of designs around for laptops built using Raspberry Pi computers, but I’ve never been that keen on the laptop form factor. Joining the screen and keyboard together always makes me feel like I’m either slumped over the screen or the keyboard is too high. I set out to build a portable computer that fitted my way of working rather than simply copying the laptop design that’s been making our backs and fingers hurt for the past decade.
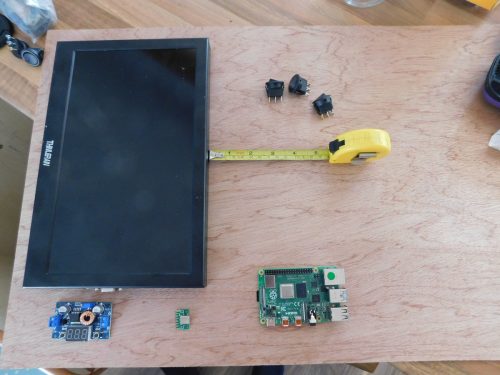
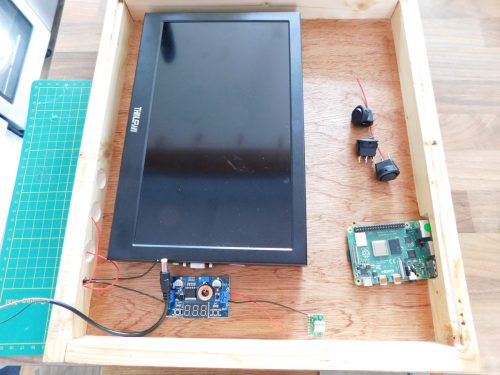
Deciding where to put the parts on the plywood backing
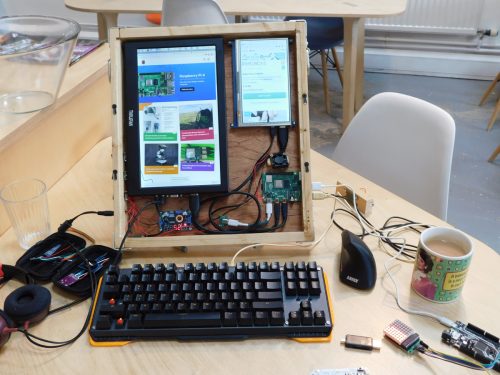
Portable Raspberry Pi 4 computer
I headed into the HackSpace magazine workshop to see what I could come up with.
A few things I wanted to consider from a design point of view:
• Material. Computer designers have decided that either brushed aluminium or black plastic are the options for computers, but ever since I saw the Novena Heirloom laptop, I’ve wanted one made in wood. This natural material isn’t necessarily perfectly suited to computer construction, but it’s aesthetically pleasing and in occasionally stressful work environments, wood is a calming material. What’s more, it’s easy to work with common tools.
• Screen setup. Unsurprisingly, I spend a lot of my time reading or writing. Landscape screens aren’t brilliant choices for this, so I wanted a portrait screen. Since Raspberry Pi 4 has two HDMI ports, I decided to have two portrait HDMI screens. This lets me have one to display the thing we’re doing, and one to have the document to write about the thing we’re doing.
• No in-built keyboard or mouse. Unlike a laptop, I decided I wanted to work with external input devices to create a more comfortable working setup.
• Exposed wiring. There’s not a good reason for this — we just like the aesthetic (but it does make it easier to hack an upgrade in the future).
A few things I wanted to consider from a technical point of view:
• Cooling. Raspberry Pi can run a little hot, so I wanted a way of keeping it cool while still enabling the complete board to be accessible for working with the GPIO.
• Power. Raspberry Pi needs 5 V, but most screens need 12 V. I wanted my computer to have just a single power in. Having this on a 12 V DC means I can use an external battery pack in the future.
There’s no great secret to this build. I used two different HDMI screens (one 12 inches and one 7 inches) and mounted them on 3 mm plywood. This gives enough space to mount my Raspberry Pi below the 7-inch screen. This plywood backing is surrounded by a 2×1 inch pine wall that’s just high enough to expand beyond the screens. There’s a slight recess in this pine surround that a plywood front cover slots into to protect the screens during transport. The joints on the wood are particularly unimpressive being butt joints with gaps in. The corners are secured by protectors which I fabricated from 3 mm aluminium sheet (OK, fabricated is a bit of a grand word — we cut, bent, and drilled them from 3 mm aluminium sheet).
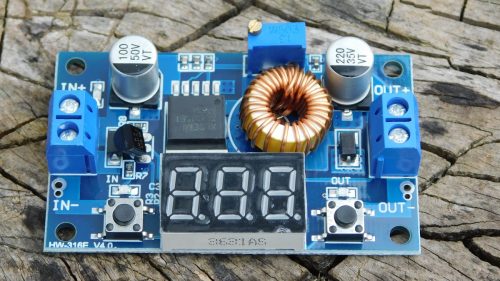
You can get smaller voltage converters than this, but we like the look of the large coil and seven-segment display
I made this machine quickly as we intended it to be a prototype. I fully expected that the setup would prove too unusual to be useful and planned to disassemble it and make a different form factor after I’d learned what worked and what didn’t. However, so far, I’m happy with this setup and don’t have any plans to redesign it soon.
Power comes in via a 5.1 mm jack. This goes to both the monitors and a buck converter which steps it down to 5 V for Raspberry Pi and fan (the converter has a display showing the current voltage because I like the look of seven-segment displays). Power is controlled by three rocker switches (because I like rocker switches rather than soft switches), allowing you to turn Raspberry Pi, fan, and screens on and off separately.
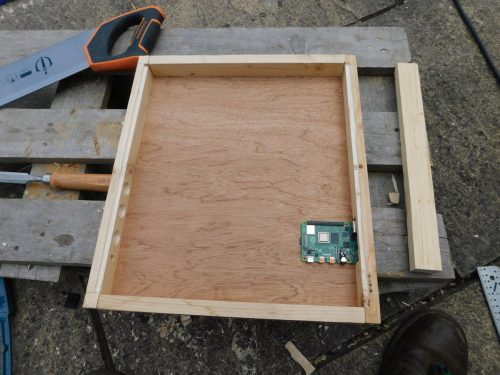
We used a spade drill bit and a Dremel with a sanding attachment to carve out the space for our Raspberry Pi
We’ve had to cut USB and power cables and shorten them to make them fit nicely in the case.
We had to cut quite a lot of cables up to make them fit. Fortunately, most have sensibly coloured inners to help you understand what does what
The only unusual part of the build was the cooling for Raspberry Pi. Since I wanted to leave the body of my Raspberry Pi free, that meant that I had to have a fan directing air over the CPU from the side. After jiggling the fan into various positions, I decided to mount it at 45 degrees just to the side of the board. I needed a mount for this — 3D printing would have worked well, but I’d been working through the Power Carving Manual reviewed in issue 23, so put these skills to the test and whittled a bit of wood to the right shape. Although power carving is usually used to produce artistic objects, it’s also a good choice for fabrication when you need a bit of a ‘try-and-see’ approach, as it lets you make very quick adjustments.
Overall, my only disappointment with the making of this computer is the HDMI cables. I decided not to cut and splice them to the correct length as the high-speed nature of the HDMI signal makes this unreliable. Instead, I got the shortest cables I could and jammed them in.
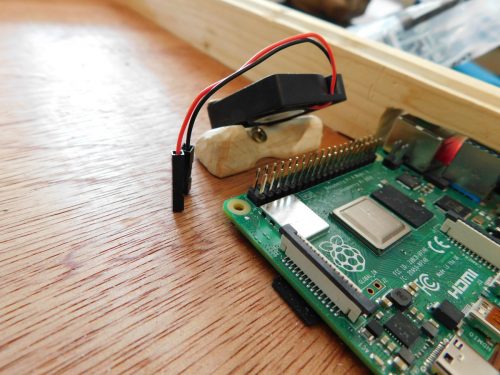
We control the fan via a switch rather than automatically for two reasons: so we can run silently when we want, and so all the GPIO pins are available for HATs and other expansions
In use, I’m really happy with my new computer. So far, it has proved sturdy and reliable, and our design decisions have been vindicated by the way it works for me. Having two portrait screens may seem odd, but at least for technology journalists it’s a great option. The 7-inch screen may seem little, but these days most websites have a mobile-friendly version that renders well in this size, and it’s also big enough for a terminal window or Arduino IDE. A few programs struggle to work in this form factor (we’re looking at you, Mu).
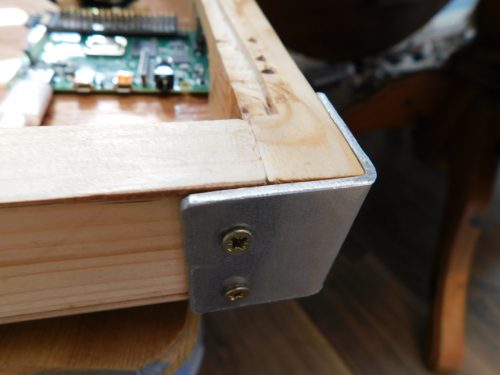
Our corners are not the best joints, but the metal surrounds ensure they are strong and protected from bumps (oh, and we like the look of them)
We live in a world where — for many of us — computers are an indispensable tool that we spend most of our working lives using, yet the options for creating ones that are personal and genuinely fit our way of working are slim. We don’t have to accept that. We can build the machines that we want to use: build our own tools. This is a machine designed for my needs — yours may be different, but you understand them better than anyone. If you find off-the-shelf machines don’t work well for you, head to the workshop and make something that does.
Hackspace magazine
HackSpace magazine is out now, available in print from your local newsagent or from the Raspberry Pi Store in Cambridge, online from Raspberry Pi Press, or as a free PDF download. Click here to find out more and, while you’re at it, why not have a look at the subscription offers available, including the 12-month deal that comes with a free Adafruit Circuit Playground!

The post Portable Raspberry Pi 4 computer | Hackspace magazine #24 appeared first on Raspberry Pi.